|
|
In my Lunar kit, a side view
of the base revealed clear signs of warping. At first, Alain tried to
salvage it by sanding the bottom down but found that the extent of the
deformation was too great. This clearly illustrates why it was again
necessary to start from scratch.
|
|
A mock-up of the new base is
displayed at the right, next to the original resin base. Corrections were
made to the curvature of the corners. Note the difference in the curvature
of the back corners between the original Lunar base and the mock-up.
|
|
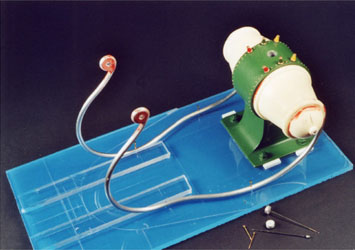
The new base (to be made in
two parts) is initially used as an alignment jig for the framework. Two
temporary guides are placed at the front of the base. Alignment pins at
the back are used to hold the motor housing in place. |
|
The motor housing is fitted
on the pins and the two aluminium skates are shaped, mounted and adjusted
using the alignment guides.
|
|
Next, the railing is added
and temporarily held in place with plastic supports. The motor housing
in the Lunar kit was found to be too short and narrow but this could only
be partially corrected. Because of this, the railing is slightly lower
than it should be.
|
|
Thin rods are used to secure
the railing to the tumblers. Their tip is designed to accept custom-made
fasteners with decorative caps. |
|
The dish-support shaft is put
in place. |
|
After final adjustments to the
aluminium framework, the control console is found to fit perfectly. |
|
Once it has been ascertained
that all parts fit properly, a coating of primer is applied. The alignment
guides are removed from the base and the latter is cut to shape and tested
for size. |